Some laptops, like the Lenovo T440p, have no PCI-Nvme SSD, but they do have more than one SATA interface. To be specific: It has one regular 2.5" SATA bay, one via a HDD-Caddy-Adapter, and a third one via a 42 mm M.2 SATA interface, if no GSM/LTE-Modem is installed.
So the idea was to use every SATA port and install Ubuntu on a Raid 0 configuration with mdadm. Ubuntu 21.10 Desktop (and older versions) do not support a Raid configuration during the installation. But the Server installation does. So we are installing a Desktop on top of a server installation.
These are the needed tools:
- A laptop with 2 or more SATA drives
- A bootable Ubuntu 21.10 Server installation USB stick
- An internet connection
Ubuntu 22.04 LTS
Sadly, I wasn't able to do the same steps with Ubuntu 22.04 Server. So in order to get Ubuntu 22.04, an installation of Ubuntu 21.10 is needed first and then an upgrade to Ubuntu 22.04.
Ubuntu 21.10
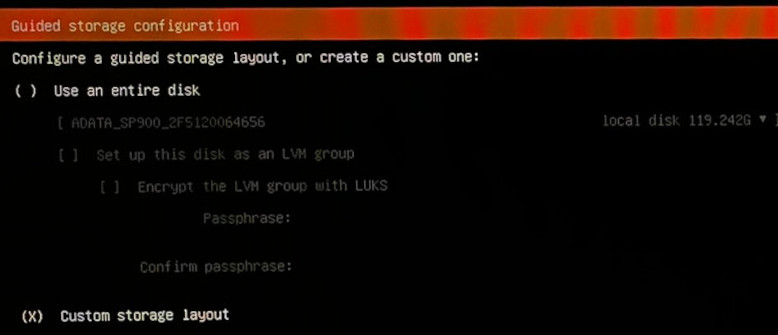
The first steps of the installation do not require special attention. It is only necessary to mention that the installer has been updated. When the "guided storage configuration" shows up, "custom storage layout" needs to be selected:
If there are still existing partitions, they must be deleted, so it looks something like this:
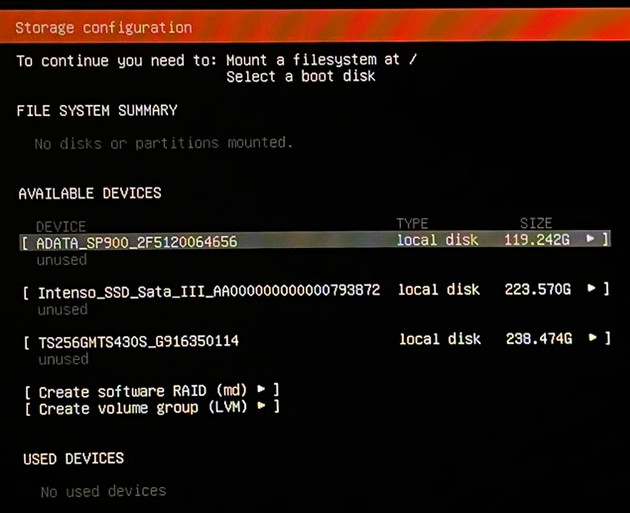
In this case, I have a 128GB, one 240GB, and a 256GB SSD in the laptop. Not the perfect solution for Raid 0, but it works.
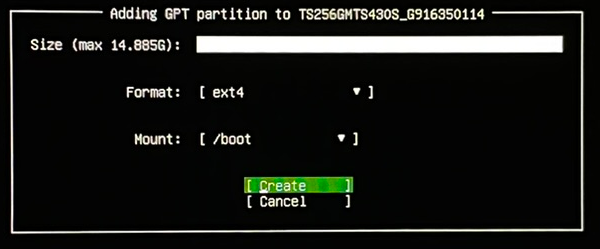
Since mdadm, the raid software, isn't available during boot, one 1GB (or more) partition is needed on one drive for the boot process.
The biggest drive gets cut off by around 15GB for the boot partition, which is just an ext4 partition with the mount point on
/boot
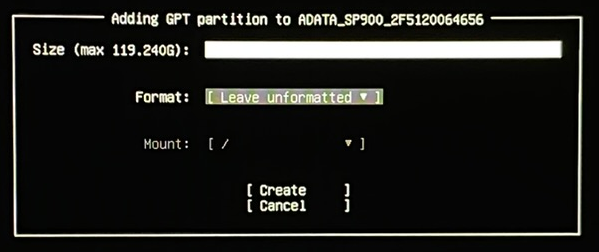
The other partitions are ~128GB, and 2x ~250GB. It is important that each partition remains "unformatted":
At the end, the layout should look like this:
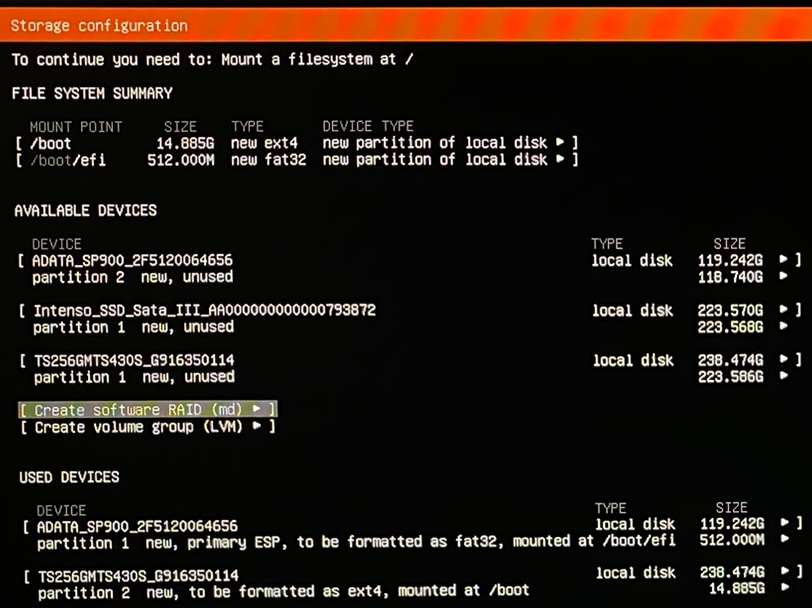
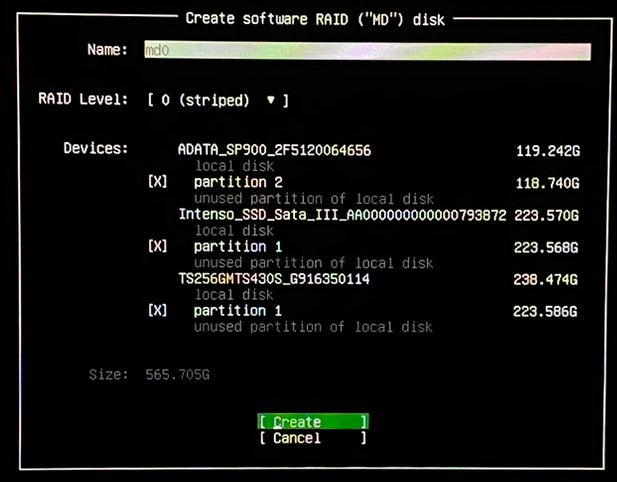
Now, the raid configuration via "Create software RAID (md)" is needed. Here, just the Raid level (0 striped) is needed and the empty partitions:
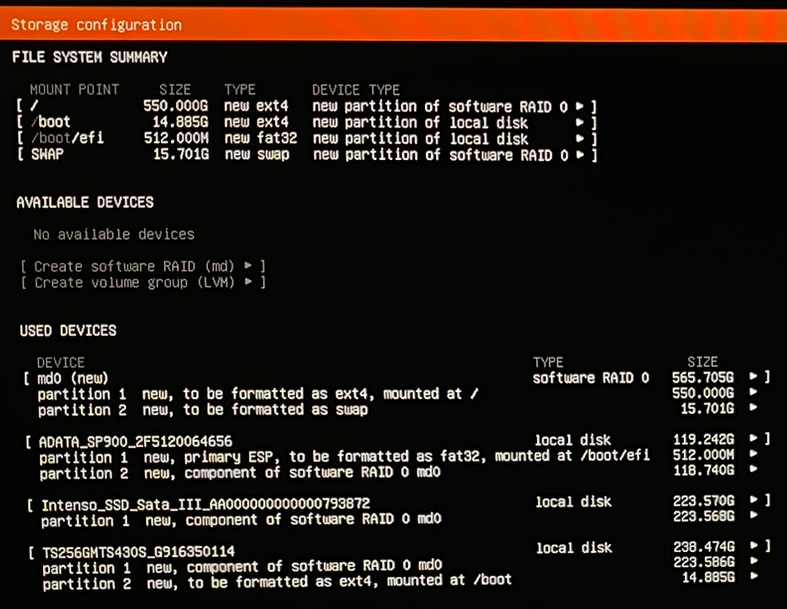
After the Raid is created, just a root partition and a SWAP partition with the size of the installed memory is needed, so it looks like this:
From this point, the installation is straightforward:
- Providing user information
- Setting the root password
I didn't install any software since (or at least) the openssh server got automatically uninstalled during the next steps. It can later be reinstalled with:
sudo apt-get install openssh-server
After the installation is complete and the machine has been rebooted, it needs to be updated and upgraded:
sudo apt-get update && sudo apt-get upgrade
Now, "tasksel" gets installed in order to remove the server components and add the Desktop GUI:
sudo apt-get install tasksel
"tasksel" can be executed by simply running:
sudo tasksel
On the next screen,
Ubuntu desktop
got selected (any other available desktop is possible too) and all other points got unselected, e.g.,
Basic Ubuntu server
and/or
Ubuntu Cloud Image (instance)
It is important not to perform a reboot after "tasksel" has finished. With the uninstallation of the server components, also "mdadm" got removed, which provides the software raid. Without this package, Ubuntu cannot boot. So it is important to reinstall it:
sudo apt-get install mdadm
After mdadm is available again, a short scan is needed:
sudo mdadm --assemble --scan
Now, the output of:
lsblk
should look like this:
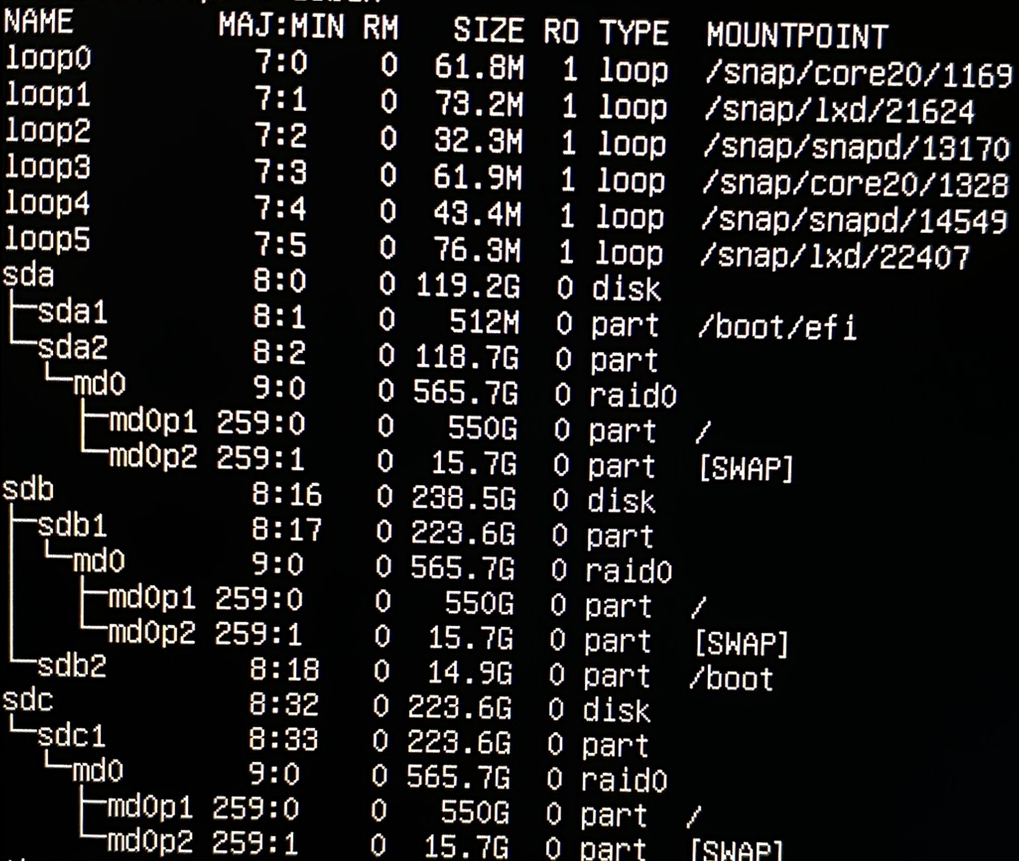
and it is now safe to perform a reboot.
After a login, it may happen that no SSIDs in the WI-FI window are available:

This can be fixed by editing the .yaml files in:
/etc/netplan/
(e.g., "00-installer-config.yaml" in my case)
The yaml file can look like this:
network:
  renderer: NetworkManager
  ethernets:
    enp0s25:
      dhcp4: true
  version: 2
After adding this line to the .yaml files, the configuration needs to be applied with:
sudo netplan apply
If the SSIDs are still not shown, a reboot is needed.
So you get a relatively clean Ubuntu installation on a software raid. Of course, the performance is not as great as with a PCI-Nvme-SSD, but it is also better than with a single SATA-SDD.
The raid performance can be tested with the following command:
sudo hdparm -tT --direct /dev/md0
/dev/md0 can also be replaced with a single SSD device like "/dev/sda".
This is the result of the individual SSDs in the system:
/dev/sda:
 Timing O_DIRECT cached reads:   898 MB in  2.00 seconds = 448.97 MB/sec
 Timing O_DIRECT disk reads: 894 MB in  3.00 seconds = 297.90 MB/sec

/dev/sdb:
 Timing O_DIRECT cached reads:   870 MB in  2.00 seconds = 434.57 MB/sec
 Timing O_DIRECT disk reads: 1492 MB in  3.00 seconds = 497.01 MB/sec

/dev/sdc:
 Timing O_DIRECT cached reads:   450 MB in  2.01 seconds = 224.10 MB/sec
 Timing O_DIRECT disk reads: 774 MB in  3.00 seconds = 257.91 MB/sec
where sda is the 128GB SSD (Adata SP900), sdb the 256GB (Transcend TS256GMTS430S) one, and sdc the 240GB (Intenso High Performance) SSD. This is the result of the Raid-0 setup:
/dev/md0:
 Timing O_DIRECT cached reads:   1764 MB in  2.00 seconds = 881.71 MB/sec
 Timing O_DIRECT disk reads: 1984 MB in  3.00 seconds = 660.68 MB/sec